Snail Pack: A backpack designed for all those fantasy-loving teachers out there, who are tired of the small or boring bookbags normally carried by stores: here is one that brings fantasy into your life! The Snail Pack.


Trends In Teacher-Orientated Design
* Brisk Green, black with “raw” leather, white, gray, tan, brown
* Tote (one-handed carrier)
* Backpack with 3+ pockets, becomes tote
* One main pocket and multiple smaller ones
* Matching detachable bag
* Water bottle holders
* Nylon and polyester fabrics (lining and outer), with a waterproof coating
* Padding inside the bag
* Tote (one-handed carrier)
* Backpack with 3+ pockets, becomes tote
* One main pocket and multiple smaller ones
* Matching detachable bag
* Water bottle holders
* Nylon and polyester fabrics (lining and outer), with a waterproof coating
* Padding inside the bag
Trends In Fantasy Wear
* Nature-inspired interpretations of everyday items (LOTS of greens, and included all the colors on the other list, as well as ^^)
* Embroidery, and detailing with piping
* Artisan-made
* Knit/crochet/woven texture is obvious
* Tends to have ties rather than buckles
* Adherence to historical appearance and functionality
* Bags tend to be tote bags (if decorative)
* Cotton/Linen (natural fabrics)
* Embroidery, and detailing with piping
* Artisan-made
* Knit/crochet/woven texture is obvious
* Tends to have ties rather than buckles
* Adherence to historical appearance and functionality
* Bags tend to be tote bags (if decorative)
* Cotton/Linen (natural fabrics)

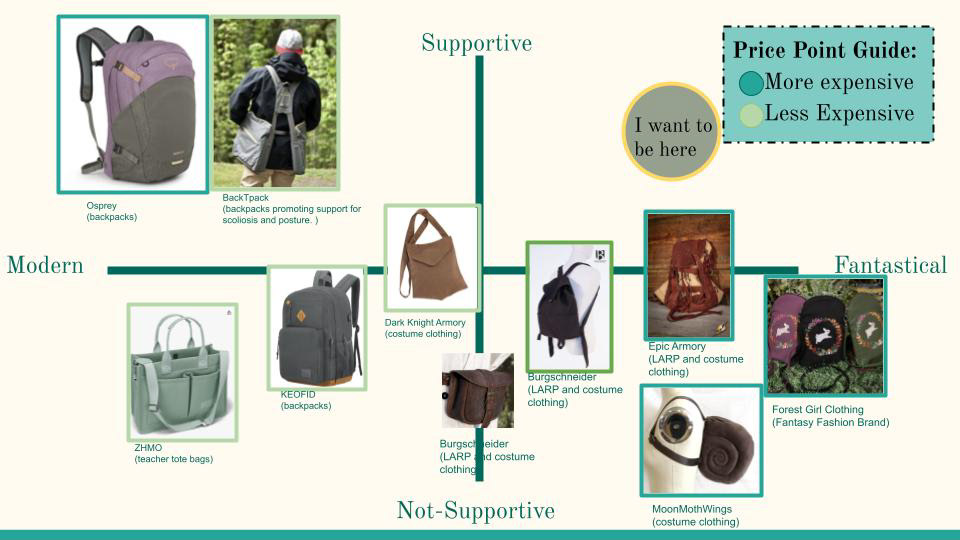
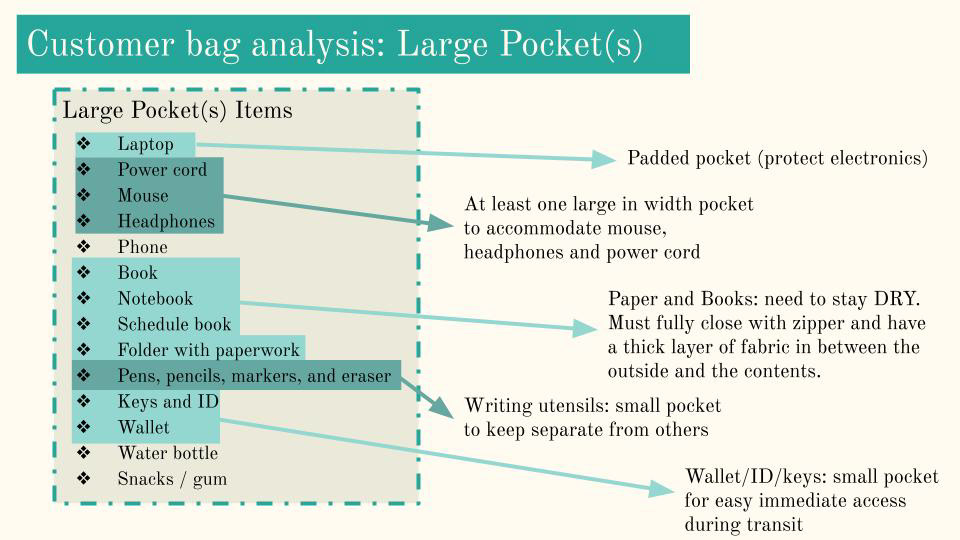
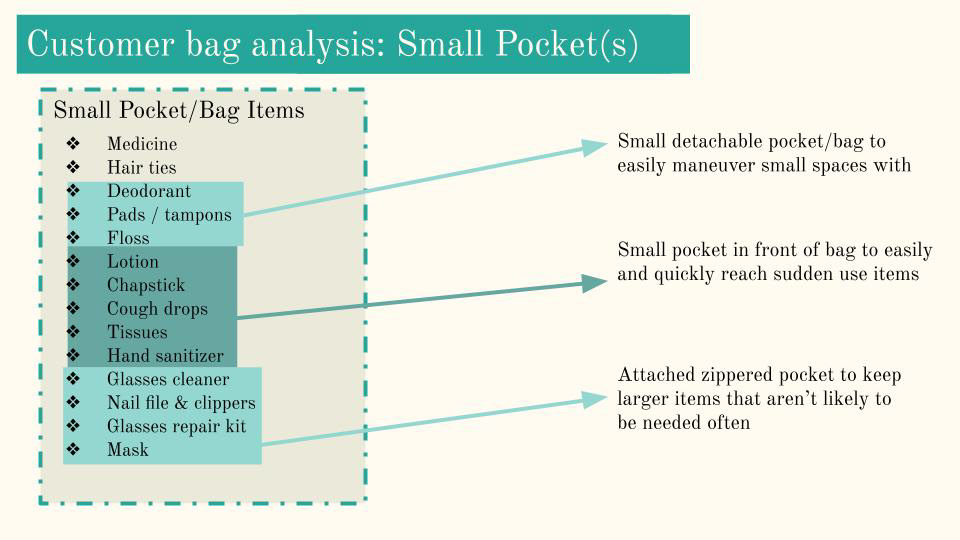
The teacher that I was making a bag for had some specifications- we worked together on learning what she puts in her bag, and where she puts it in her bag. I also discussed with her some other fantasy brands she has gone to, for clothing and functional items, such as bags.
Sketches, Planning, and Patterning
I had a few different considerations going into this piece: I wanted to do something technically challenging for myself (who is an experienced sewer), while also meeting my client's needs. So I came up with this "Snail Pack" design. I wrote and photographed a "how to sew" step-by-step, which I am linking below, as well as a tech pack, should I send this backpack off to be produced in the industry.
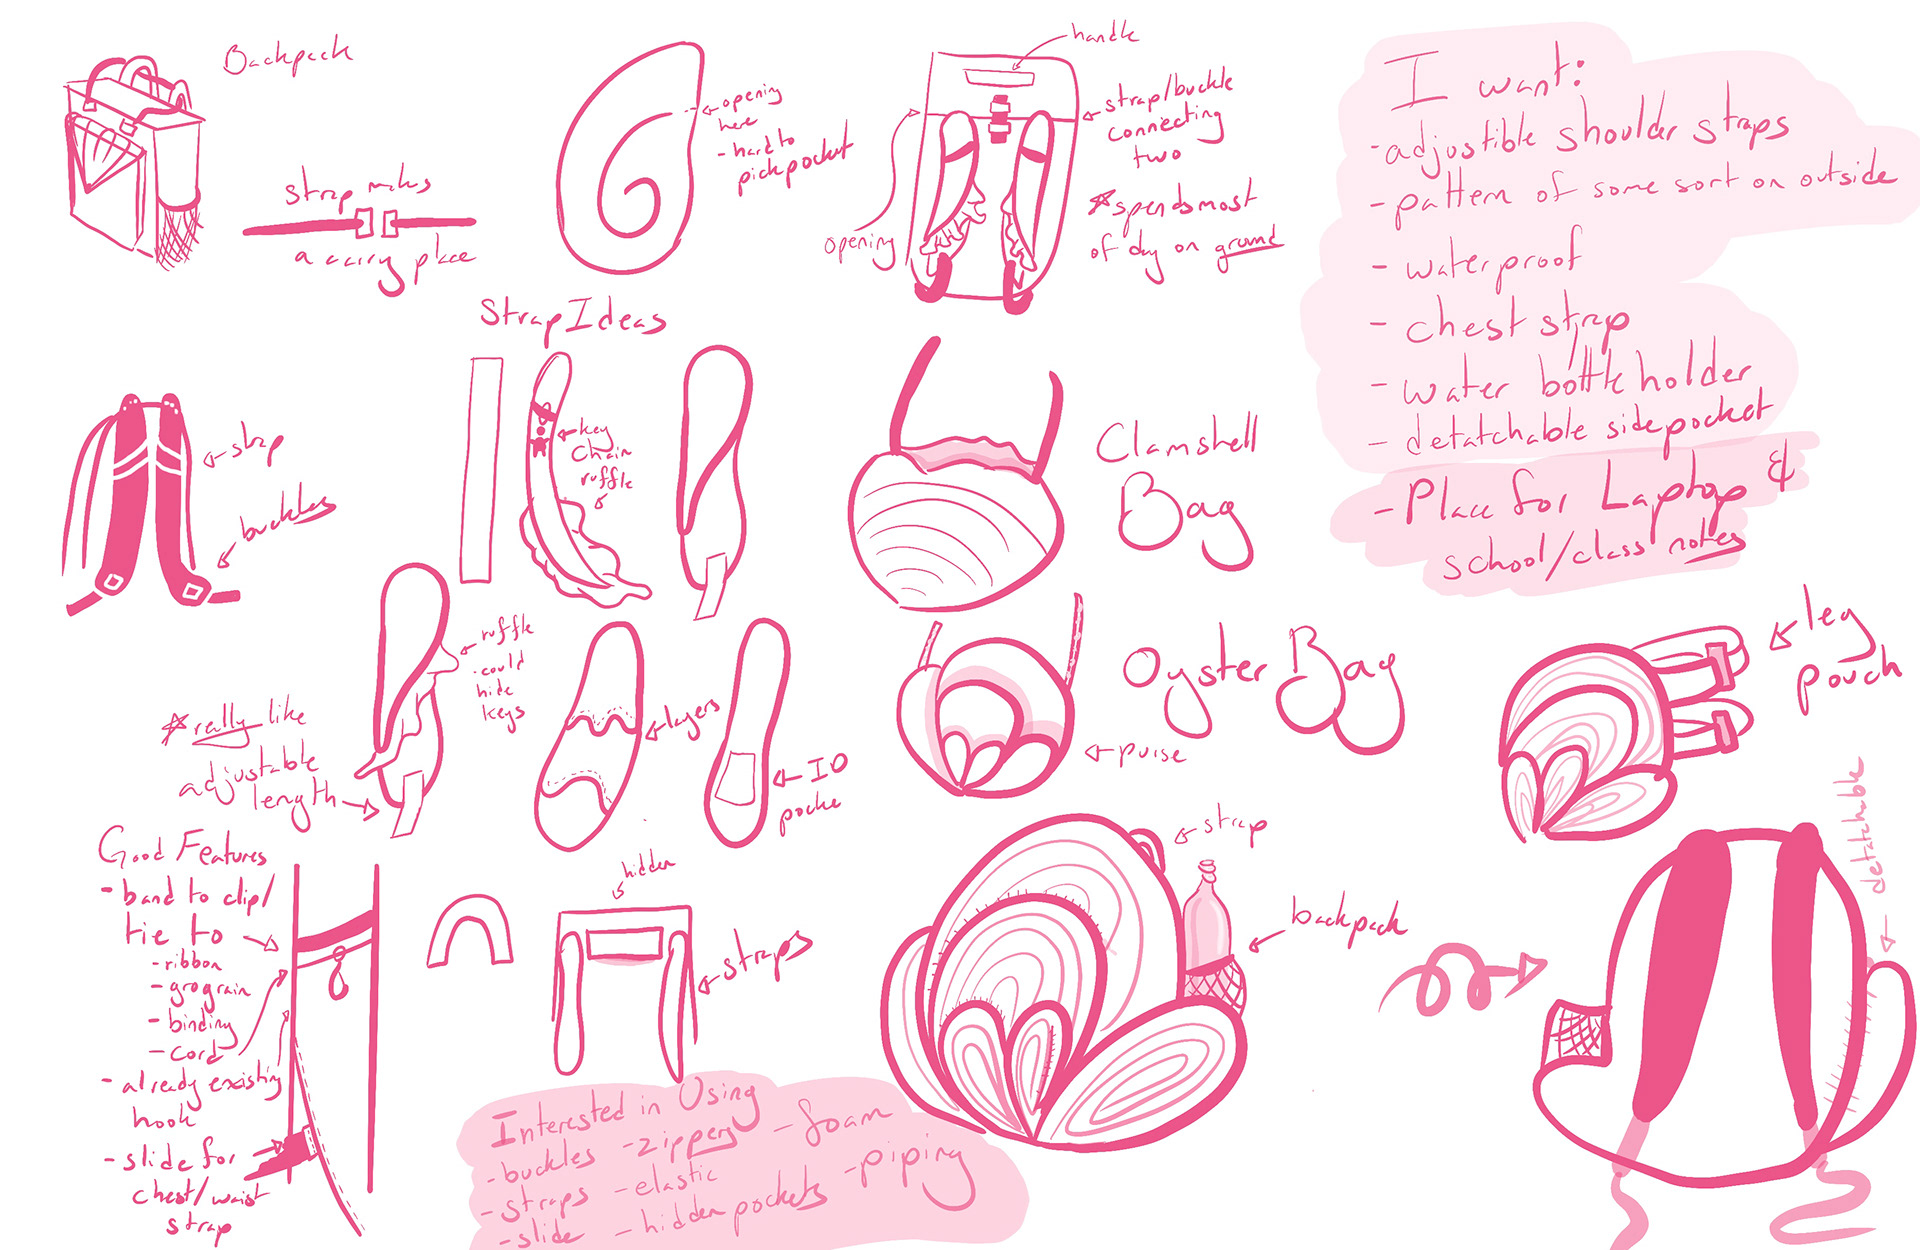
I was heavily inspired by different kinds of shells when sketching initial ideas. Below, two images are shown- a sketch before I did paper prototyping (the green one), and a sketch after (the gold and cream sketch) .


Prototype Number 1: First Draft in Paper


From here there were a few concerns I wanted to address:
* Must have a side pocket for small items
*I want the mini side pocket to be more ingrained into the design.
* I want the removable pocket to be perfect for change or a card. I want it to be leaf or swirl shaped.
*I want the mini side pocket to be more ingrained into the design.
* I want the removable pocket to be perfect for change or a card. I want it to be leaf or swirl shaped.
Top of the bag: I want there to be a magnetic attachment there.
* I like the shape of the bottom of the bag
* Straps: Adjustable buckles on the bottom of each of the straps so the cord/webbing can adjust the length of the strap.
* I like the shape of the bottom of the bag
* Straps: Adjustable buckles on the bottom of each of the straps so the cord/webbing can adjust the length of the strap.
* Inside of Bag: I want the large computer/laptop section to have padding, and to be nice and thick and secure. I want it to be more even on either side (I think in this bag it’s a bit lopsided)
* Smaller pocket: I want this to be a separate zippered section
Prototype Number 2: Final Draft in Paper
The pattern for the bag was created out of this draft.


Prototype Number 3: First Fabric Prototype


I used a thick canvas for this prototype, along with some extra zippers I had around and some extra piping. I decided to not go ahead with using piping in the final bag- it did not support the swirl as much as I thought it would.
Prototype Number 4: Second Fabric Prototype


I used recycled curtain material, that had a wonderfully stiff backing that supported the bag beautifully. The white material is an old bedsheet, which laid beautifully as the ripples in the front.
Prototype Number 5: Third Fabric Prototype


I used a thick home goods fabric, as well as more of the bedsheet material. It fit my everyday items beautifully, with room to spare. However, it was still a little messy on the inside.
Prototype Number 6: Fourth Fabric Prototype


I used a thick home goods fabric, as well as a richly colored (recycled) table cloth for the lining and accents. The only part I didn't line was the top, but I decided that part should also be lined in the final bag. At this point, in testing, the bag was fitting very nicely on my back and could be adjusted easily while walking from class to class.
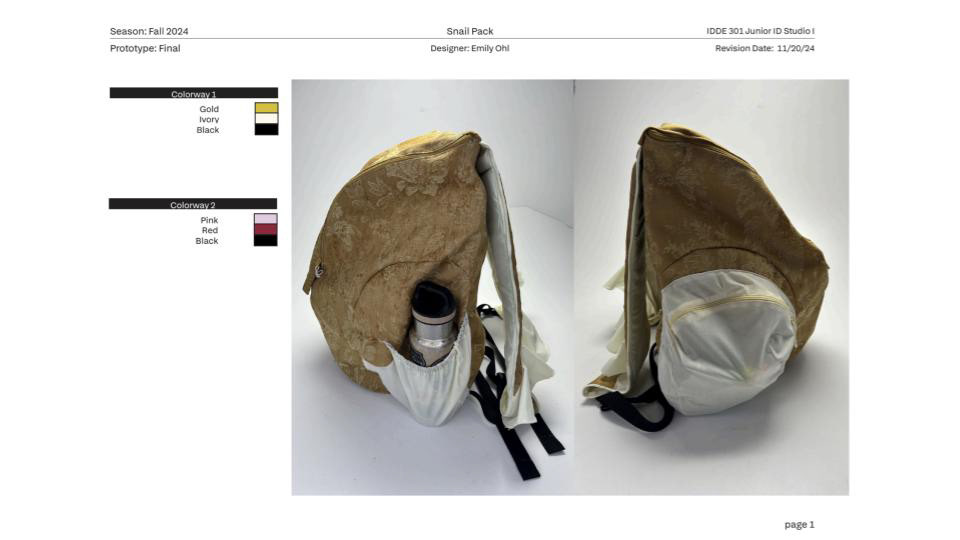
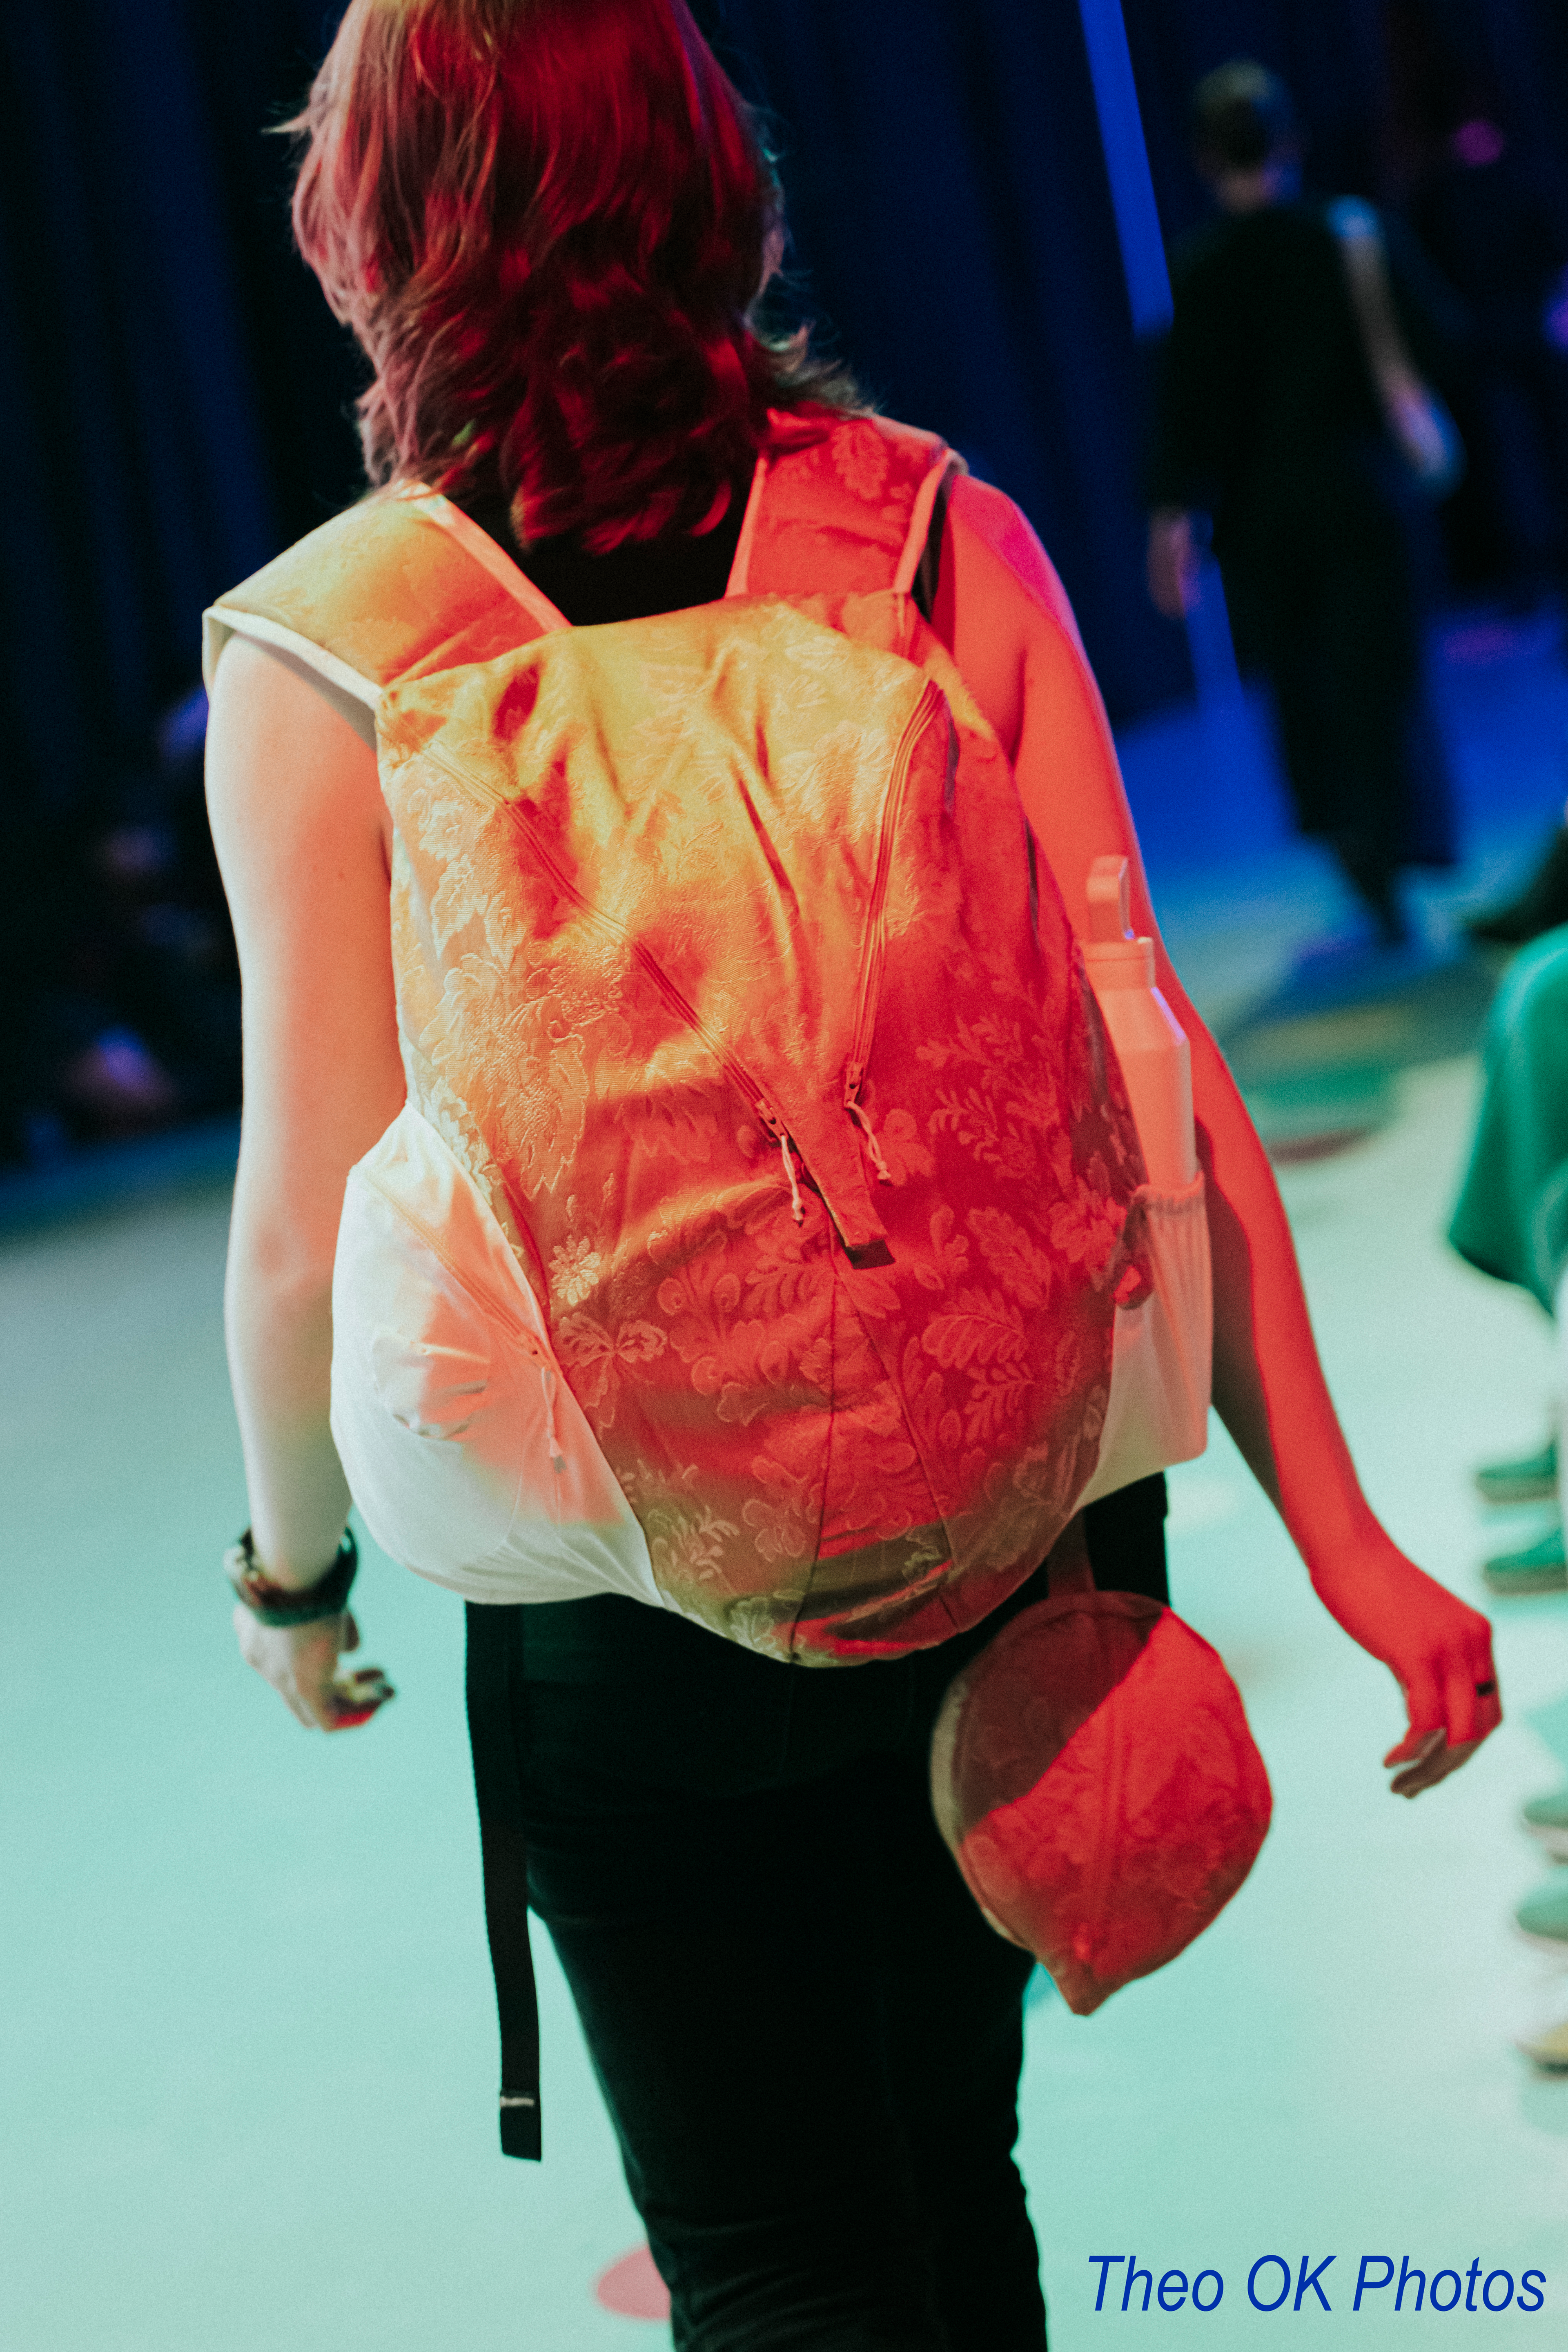
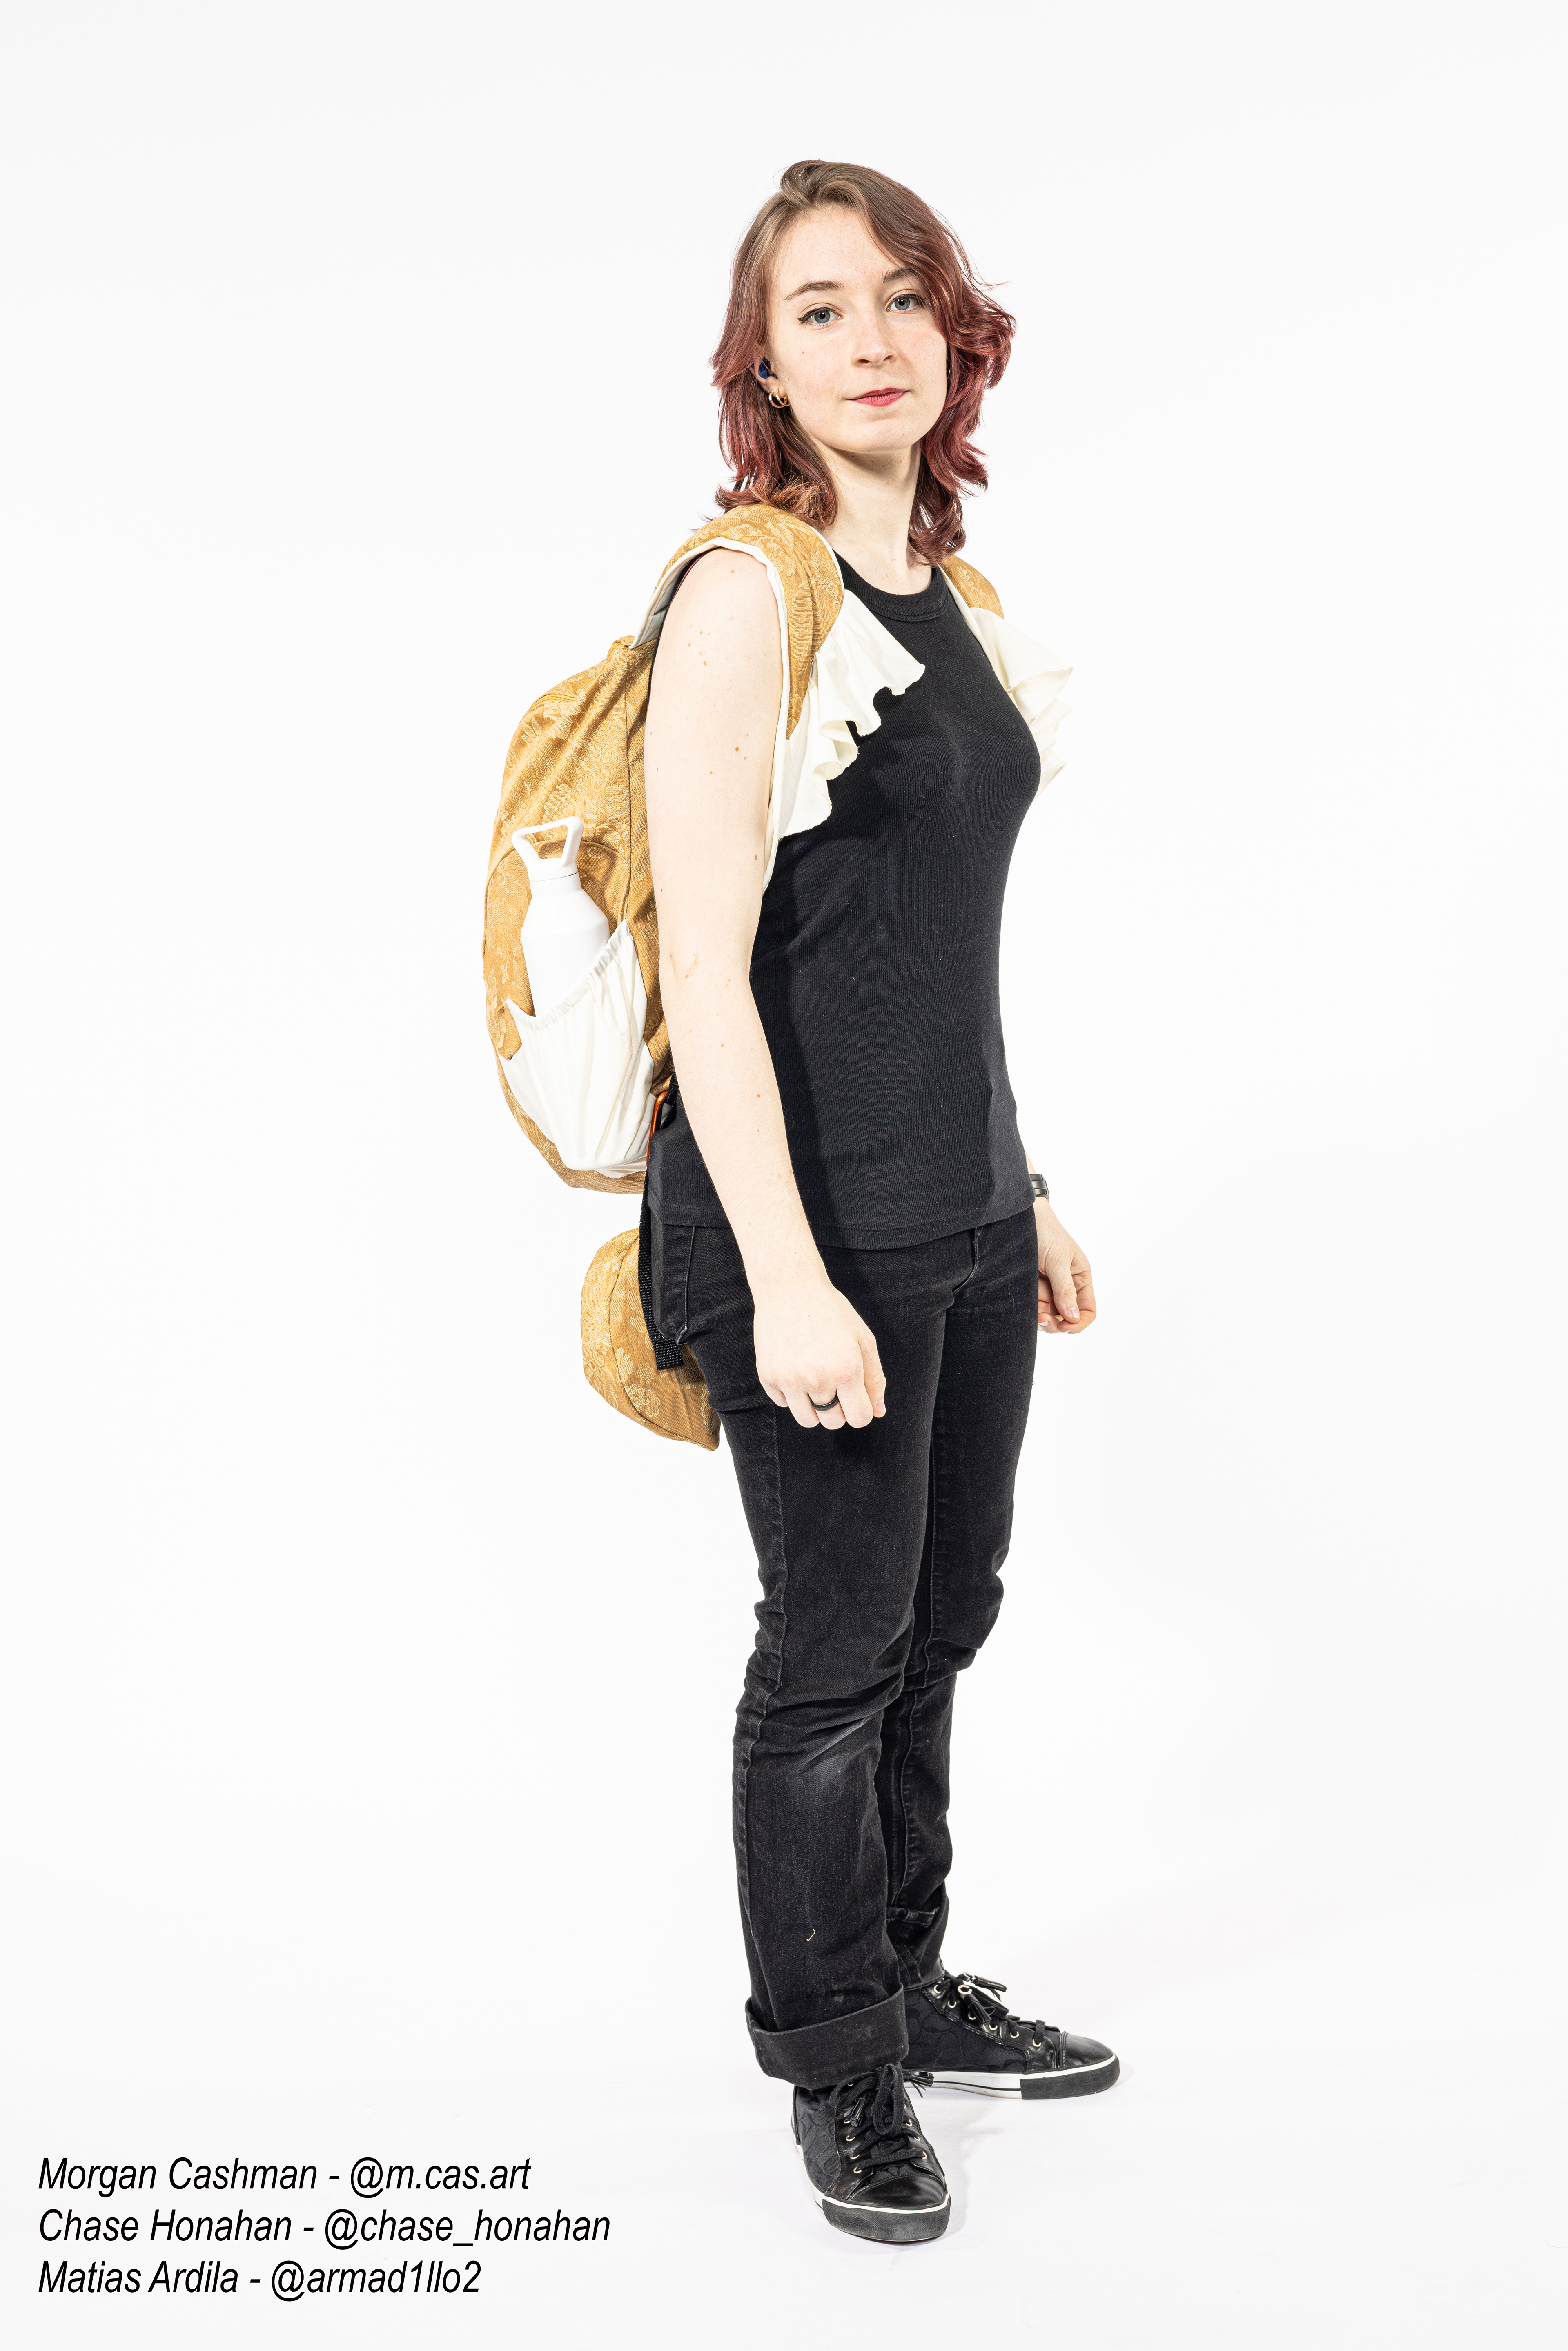
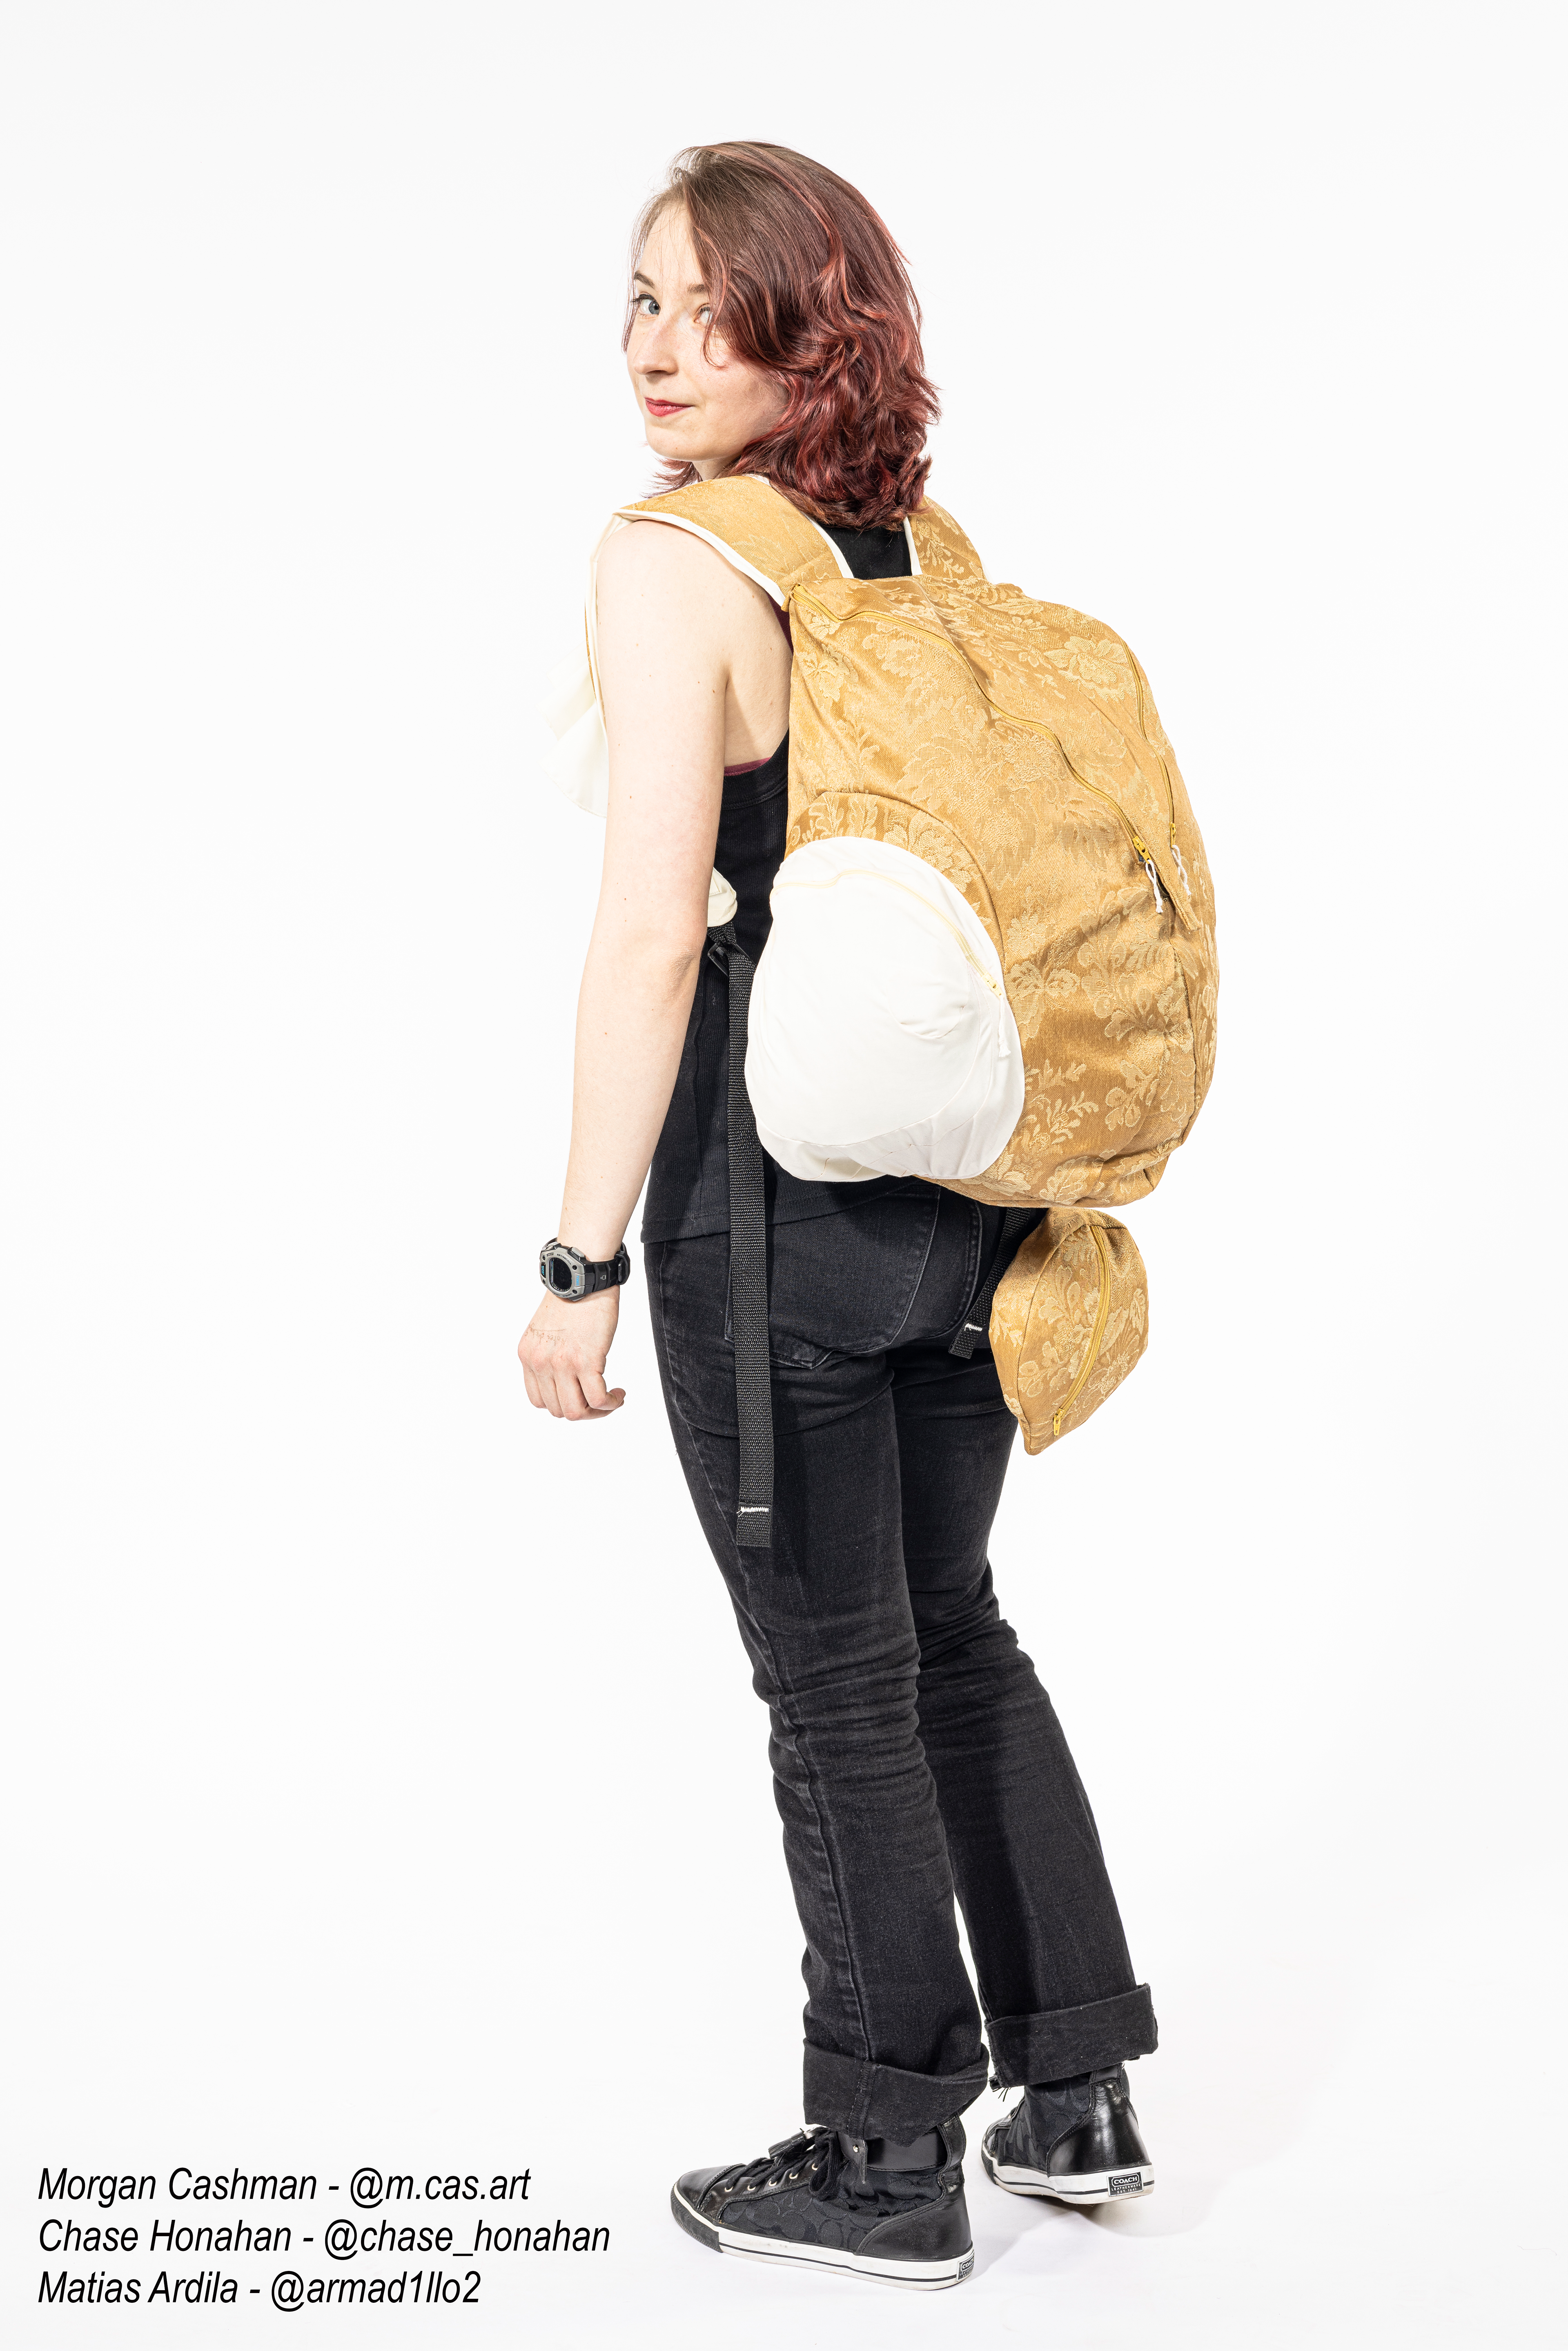
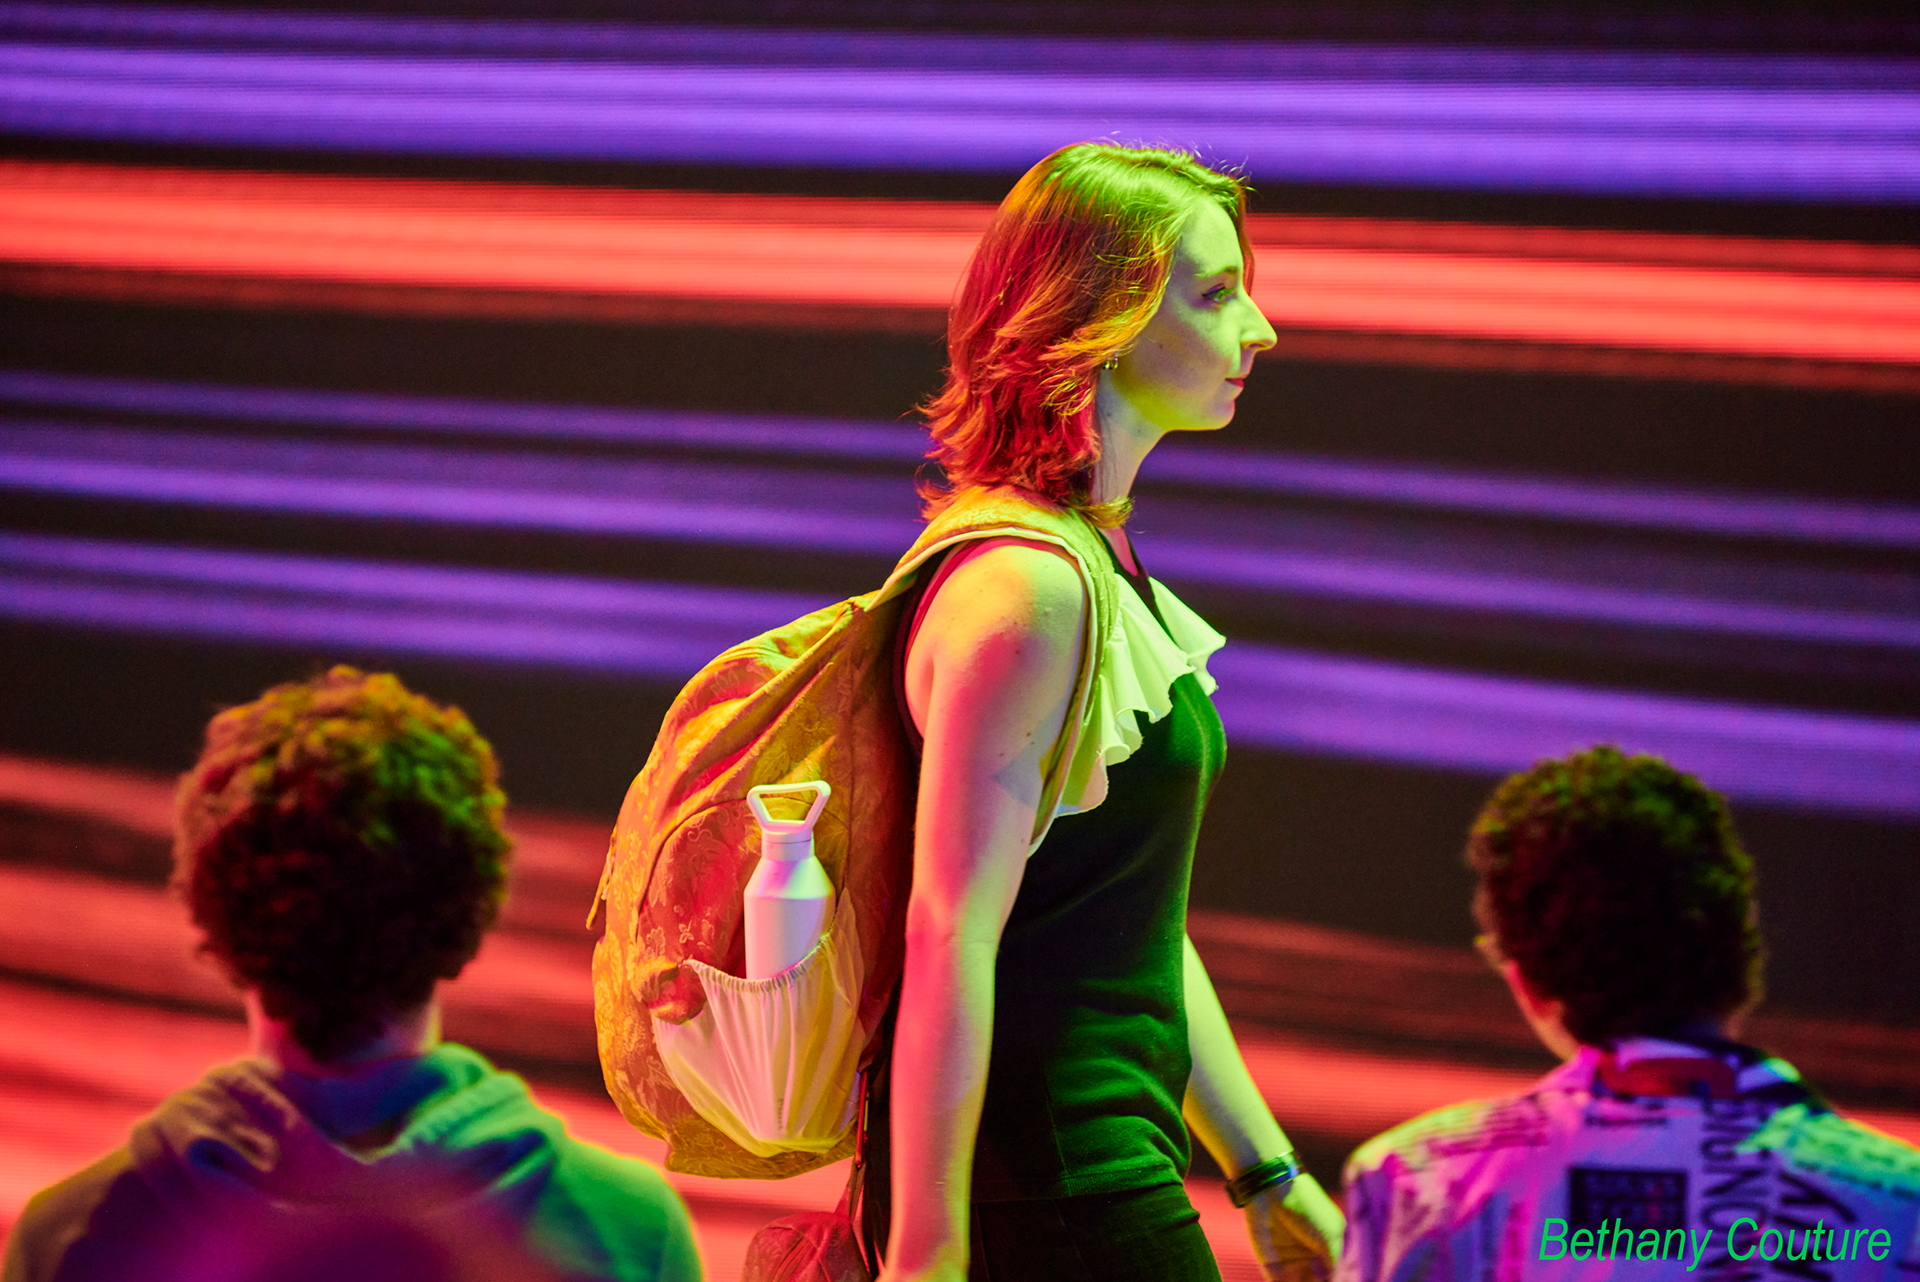
FINAL Fabric Snail Pack Prototype


Using that same curtain fabric, the final bag was sewn and fully lined. It took me a total of 8.5 hours of straight sewing, not counting the 2 hours it took me to trace and cut each pattern piece out of the fabrics (both outer and accent/lining).
I walked, with my bag, in RIT's Beyond Fashion 2024 Event, alongside a few of my other classmates, who's work was also chosen to attend.

Final Deliverables:
Process Book: including a detailed step-by-step instruction guide on how to make (sew) this bag, as well as an overview of my research and process.
Tech Pack: information industry would need to know to mass produce this bag for purchase.